


Lock Laces
No Tie Replacement Lacing System - White
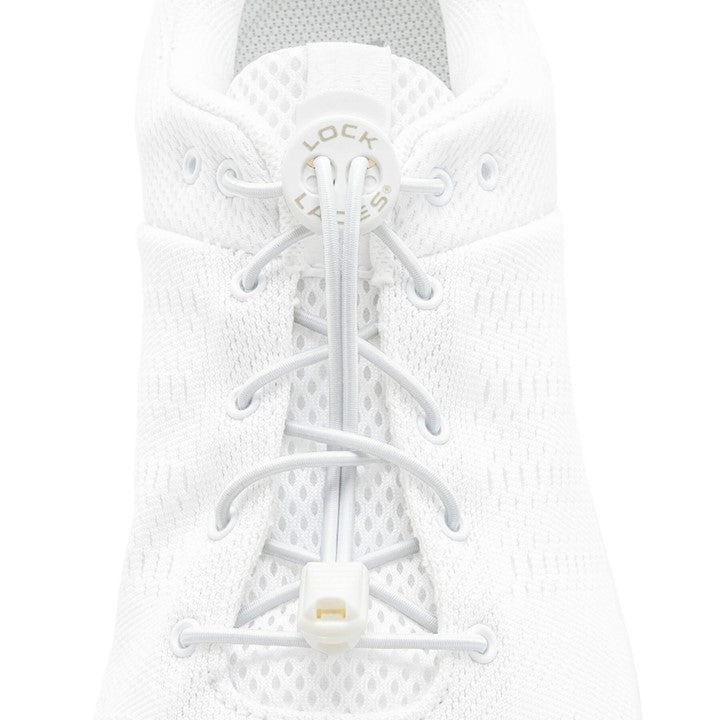
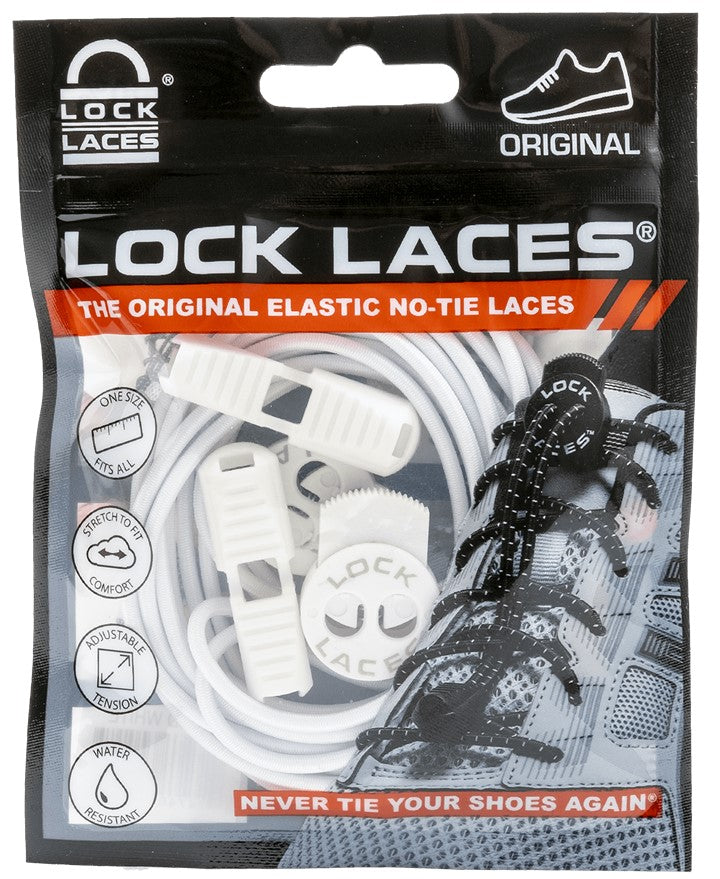
White Solid Lock Laces® will easily match any shoe! They are a very discreet and classic look that matches any color of shoe, complementing both light and dark shades. One-size-fits-all. For kids, serious athletes, people with special needs, the elderly and adults. Each pair of high performance, quality and utility Lock Laces® contains two 48” elastic laces, two lock devices and two cord clips and is suitable for lacing up one pair of shoes.
Lace Diameter: 6 Strands, 0.22cm
When you open your package of Lock Laces®, you should find the following:
- 2 48” Elastic Shoelaces
- 2 lock devices
- 2 cord clips

You will also need:
- 1 pair of shoes
- 1 pair of scissors
Alright, now that we have everything we need, let's get started!
Step 1: Replace Your Laces
Put your feet in the shoes. We always recommend keeping your feet in the shoes throughout the installation process to ensure a proper fit.
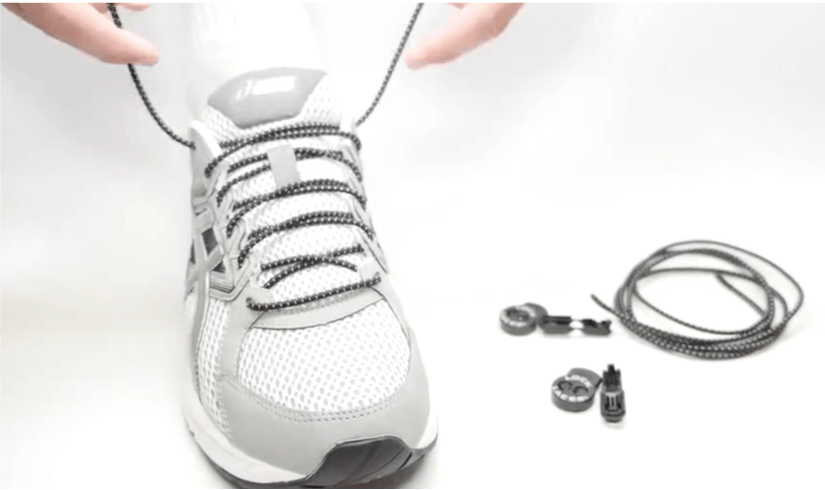
Now remove your old shoe laces and lace up with your new elastic shoelaces.
Step 2: Lock-In
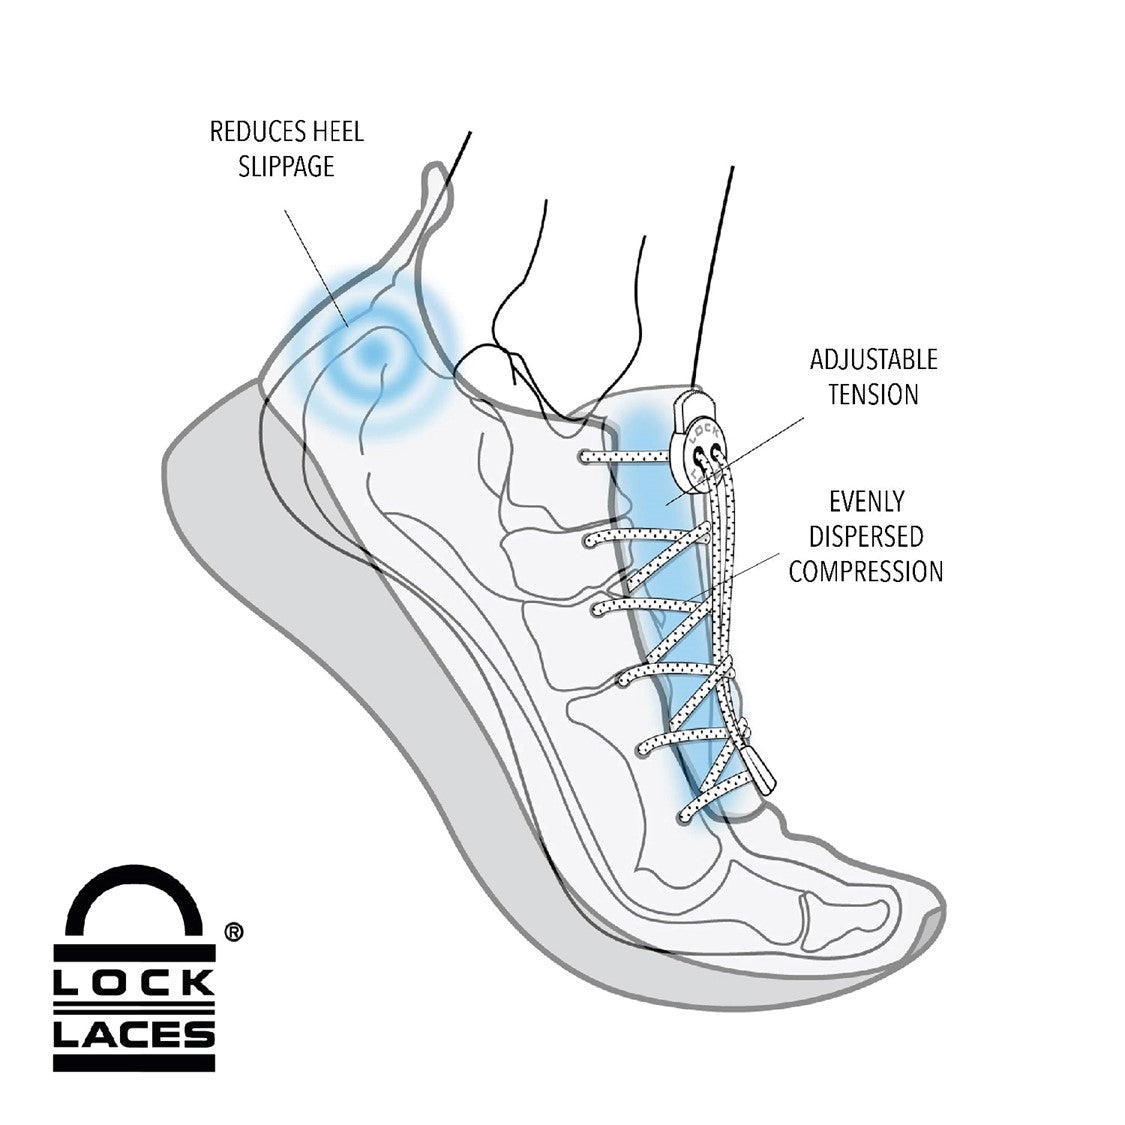
Grab a lock device (the piece that says “LOCK LACES®” on it). Press down on the top of the lock to open the passages, and thread the ends of the laces through the passages with your other hand.
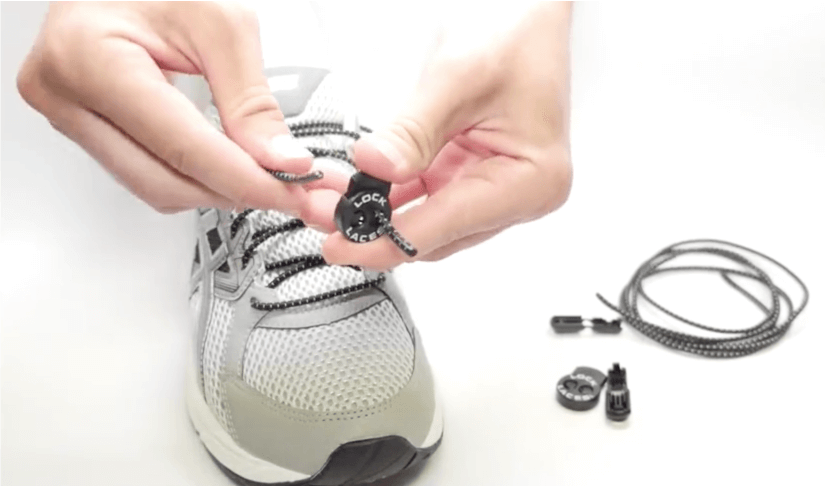
Once the laces have been threaded through, press down on the top of the lock again and slide the lock to the tongue of the shoe. Release to secure the lock device into place.
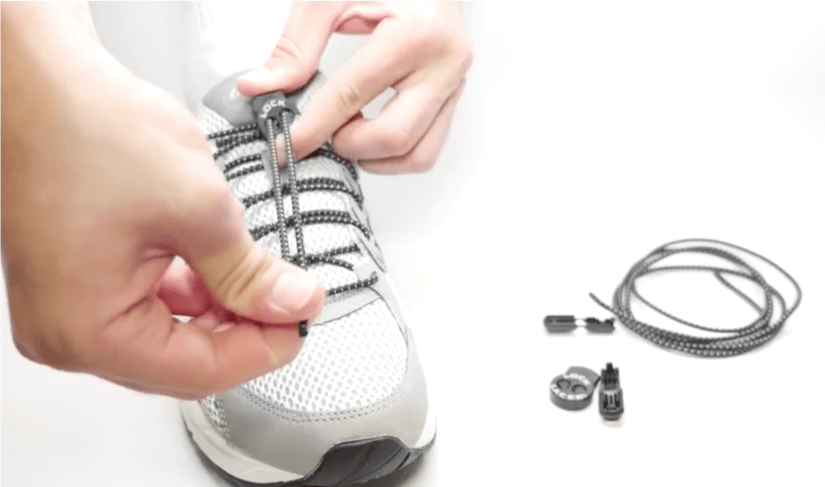
Step 3: Trim to Fit
Before trimming the excess lace, make sure your laces fit snugly but are not too tight. We recommend wiggling your foot in the shoe or, better yet, standing up and walking around the room to make sure they are at a comfortable length. If your laces are too tight, slide the lock toward the toe of the shoe slightly, readjust the laces and repeat.
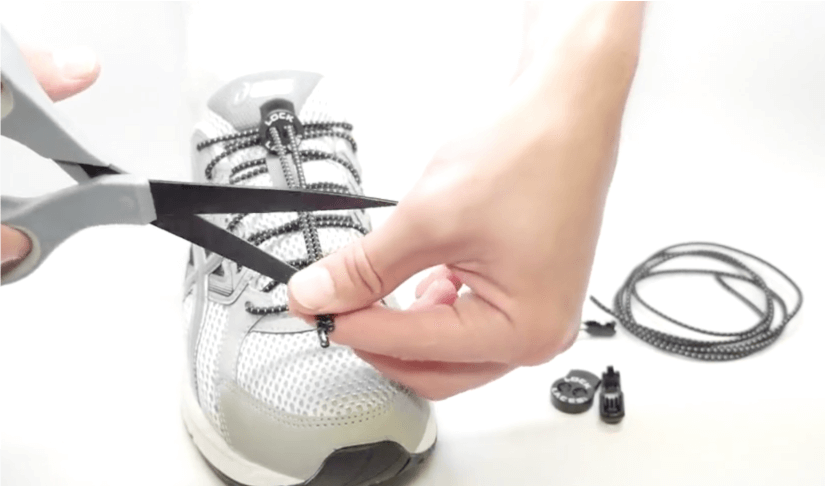
Once your laces fit comfortably, use a pair of scissors to trim off some of the excess lace. We recommend cutting about 2-3 inches below the lock device to leave room for future adjustments.
Step 4: Secure
Finally, slide the cord clip onto the ends of the laces and align the trimmed ends with the teeth inside the cord clip. It is very important that you align the ends with the cord clip properly to ensure that the cord clip stays securely attached. Then, simply snap the cord clip together to secure.

If you have any difficulty with your cord clip, please see our article on reopening and reinstalling your cord clip.
Congratulations!
Your Lock Laces® are now installed and guaranteed for the life of your shoe.
Warranty
Lock Laces® offers a 100% Satisfaction Guarantee. If you are not completely satisfied for any reason, you may return the product within 30 days from the date of purchase for a full refund. Please follow our Returns Procedure guidelines to return the product to our warehouse in order to receive your refund.
Replacements or Exchanges
Please contact us if you have any defective parts, are missing any components or would like to exchange any unused product.
Lock Laces® lifetime warranty covers manufacture defects and workmanship under normal use in one pair of shoes. Excessive wear and tear through improper use and uses other than intended purpose are not covered.